Academic Hugo Theme via Blogdown: Where to start?

Setting up a personal website is fun and a great way to reach visibility. Whether its your work, skills, or other hobbies, they all can reach the light of day in one platform!
I will go over building websites via blogdown with Hugo’s Acadmeic theme as a template. Though Yihui’s blogdown tutorial is the ultimate Holy Grail. I wanted to write a simple tutorial about getting started with a quick and easy website without getting overwhelmed :)
0. Getting Started
By running the following commands in R:
#set up
install.packages('blogdown')
library("blogdown")
blogdown::install_hugo()
#start creating a website by new_site()!
blogdown::new_site(theme = "gcushen/hugo-academic")
#I have passed the academic theme above

#view your website locally
blogdown::build_site()
OK. This created a bunch of files in your directory, and created a static website, something like this
This is an exhaustive overview of how the Academic template looks like. We don’t need all of these functionalities, and we can only retain what we like.
If you mess up something, original GitHub code is available here for your reference.
1. What’s going on?
A lot!
First place I would recommend trying is getting familiar with .md files present here your website folder > content > home
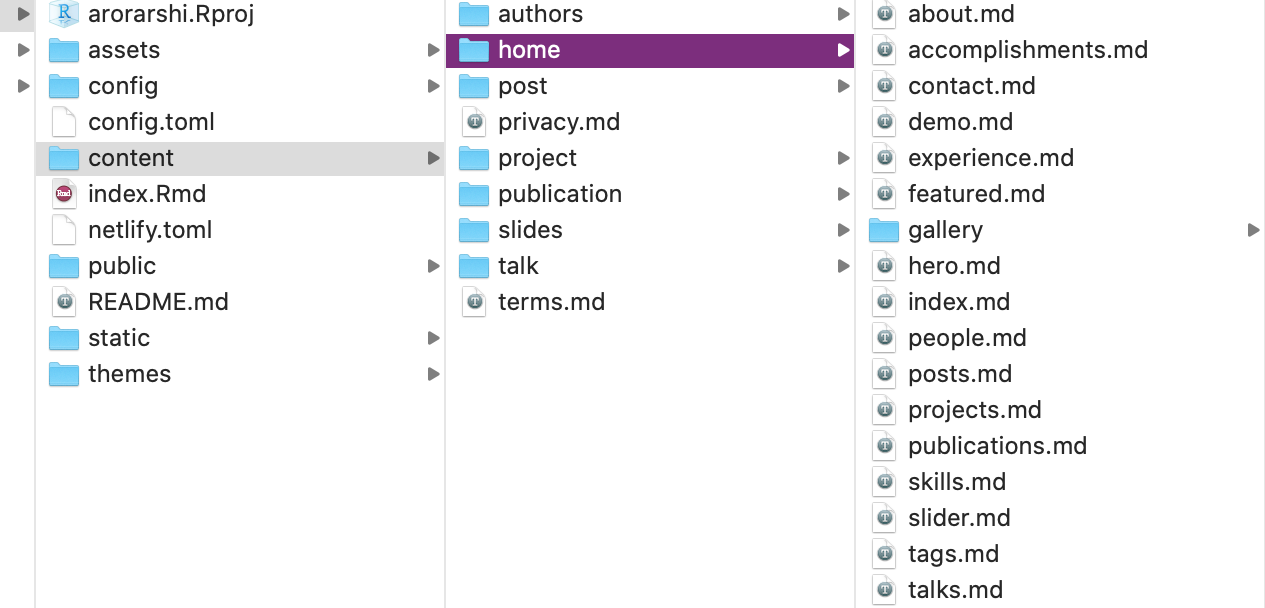
We are looking at this
Each .md file here is a functionality/widget of the Academic theme. For example, if you see the skills section of the website has icons in rows, experience section is in a bullet-timeline format, and so on. They are all controlled by the files here, and are displayed by logical active=true/false as follows-
# About widget.
widget = "about"  # See https://sourcethemes.com/academic/docs/page-builder/
headless = true  # This file represents a page section.
active = true  # Activate this widget? true/false
#
If active=FALSE widget is suppressed and displayed if TRUE. Start by turning everything FALSE except -
about.mdskills.mdexperience.md
Also, note the weight section in the .md script. This is the order in which widgets will get displayed on your website. For example, the bubbles image background at the very top has weight=1 as seen in slider.md.
2. Getting the hang of it?
After turning off all the widgets, except about.md, skills.md and experience.md (you don’t have to delete others, and might want to store them for later). You will have the bare bones of your website.
Now start filling in some details. The about.md file points to content -> authors -> admin -> _index.md file, from where it stores and displays all that information. Fill it up with your own deets!
Same goes for skills.md and eperience.md
3. config.toml and config folder
I use config.toml for all my settings, and as the name says config details. Remaining stuff like menu details go to config -> _default -> menus.toml, and params.toml for all website settings like theme, color, and other settings. (You won’t need a lot to start with)
config.toml
Here, I have everything as default except-
baseurl = "https://arorarshi.rbind.io/"
title = "Arshi Arora"
copyright =

paginate = 10  # Number of items per page in paginated lists.
enableEmoji = true

sharing = true

#fixing image in posts
#this just puts the image used in your rmarkdown posts to appropriate folder, so that it doesn't appear broken on website. confused? you can skip for now.
uglyurls = true
#[permalinks]
# post = "/:year/:month/:day/:slug/"

[blackfriday] bit
#this is only needed for .md files. Pandoc is better for .Rmd. Maybe remove later but for now I have it in.
params.toml
For a basic setup, you don’t need to worry about this.
4. Rinse and Repeat
Keep adding interesting details about yourself and playing around with the widgets. I will add deployment and other intricate details in the next post!
References
Arshi Arora
Research Biostatistician
New Yorker from Jaipur, India. Cancer Genomics, pottery and biking.